Learn everything you need to know to effectively work with the Action editor in ClimateOS.
Content
Structure of the Action editor
The Action editor can be found under the Actions tab in the upper navigation menu (Fig. 1).
Fig. 1

The Action editor is the main section of the platform to work with the actions that support your transition. On the left-hand side, you can see the tree menu which reflects the structure of your transition hierarchy. On the right-hand side you can see a full list of actions sorted according to the action statuses you defined in the Action settings.
Action statuses in ClimateOS are used to classify actions. They provide an overview of your actions at different implementation stages.
For example: splitting action implementation into three statuses in order for viewers to understand what actions are being planned, what actions are in the process of being delivered and what actions have been completed
Fig. 2

Adding actions
To add new actions, click on Create new action above the list of actions (Fig. 3).
Fig. 3

This opens a slide-out window on the right-hand-side of the screen, overlapping parts of the action list (Fig. 4). This slide-out window allows you to further describe and manage your actions.
Fig. 4

Adding details to your actions / Making actions SMART
As already described, clicking on Create new action or on any existing action opens the action slide-out. This is where you can enter information in several places to describe your action in as much detail as possible, making sure that they are self-explanatory to others. To have actions be SMART: Specific, Measurable, Achievable, Relevant and Time-based.
To support this, there are several subsections within each action, they are:
Action Summary
In this subsection, you can (Fig. 5):
- Name your action
- Provide a short summary
- Provide a more extensive description (for example, how it might be measured, etc)
- Upload an image (using online image source via URL)
- Provide credits for the image
Fig. 5

In order to upload an image, enter the URL for where the image is stored.
To do so, upload the image to your organization's data storage (i. e. Google Drive, Microsoft OneDrive, etc.) and create a link to the file.
If you want to upload an image from a search engine on the internet (i. e. Google, Bing, etc.), copy the image address by right clicking on the respective image and pasting the link into the field indicated above.
In either case, please make sure the images you are using either have a Creative Commons license, you have the creators consent or you own them yourself.
In case you're using another person's images or images with a Creative Common license, make sure to provide the credits in the corresponding field.
About the action
This subsection enables you to add a deadline and assign responsibilities. For the type of actions, you currently can choose between policies, commitments, administrative actions, financial actions, informative actions and research and development. If you identify further action types, please contact us through support@climateview.global (Fig. 6).
Fig. 6

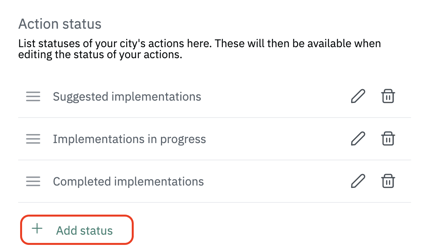
The status corresponds to the action status you defined in the Action section under Action: Action settings. The statuses allow you to group your actions together according to what their level of implementation is. They also show up in the dashboard. Per default, those statuses currently are (Fig.7):
- Suggested implementations
- Implementations in progress
- Completed implementations
Fig. 7

If you want to know how to change these statuses, please refer to the chapter on Adding or removing action statuses found further down in this article.
The About section also allows you to mark an action as Working material (Fig. 8). If this checkbox is clicked, the action will not be displayed in your published dashboard. This is helpful if you are working on a not yet approved action.
Fig. 8

SMART tab
This subsection allows you to provide specific information about the action (Fig. 9):
- Overall Deliverability RAG Rating
- Affected groups
- Effect for groups
- Contribution to transition element
- Necessary stakeholders
- Potential barriers

The 'Overall Deliverability RAG Rating' (RAG stands for red, amber, green) allows you to make an evaluation about the probability of an action being implemented, by considering priorities and identifying barriers (Fig. 10).
Fig. 10
 Watchlist
This subsection allows you to add actions to your watchlist, which you can then access by clicking on the Watchlist section found on the top navigation bar. By setting a follow-up date for the action in the Date field, this action will be added to your watchlist.
You also have the option of adding a responsible person and a comment. This information will also show up in the Watchlist. It is designed to support your internal action management. Currently, you can only choose between the people who have access to your ClimateOS platform account (Fig. 11).
Fig. 11
 Connected transition elements
This subsection gives you an overview of the transition elements connected to a particular action. To help understand what effect the action is having on the transition element (Fig. 12).
Fig. 12
 Connecting actions to transition elements
In order to connect actions to transition elements, select the particular action from the action list by clicking on it. Once selected, click on Connect to transition elements above the action list (Fig. 13).
Fig. 13

This expands the whole tree menu on the left hand-side, showing all transition elements per sector and sub-sector with a checkbox to the left of the name. Click the checkboxes of the transition elements you want to connect the action to (Fig. 14). Connecting them puts them in a direct relationship with each other and contributes to how they will be seen in the published Dashboard. Therefore, determining which actions have an impact on which transition element(s) is an important consideration.
Fig. 14

When you've selected all the transition elements you want to connect an action to, click on Confirm above the action list to accept the selection (Fig. 15).
Fig. 15

Once you connect an action to a transition element, this action will show up as visible in your dashboard.
In case you created an action and connected it to a transition element, but don't want to make it visible to the public through the dashboard (in case you already published your Dashboard), you can click the checkbox next to "Working material" found in the About subsection within each action. This might be helpful when you have already published your Dashboard and are entering new actions that should not be visible (Fig. 16).
Fig. 16

Adding actions to your watchlist
To add an action to your watchlist, select the desired action from the action list (Fig.17).
Fig. 17

After clicking on the action, click on the Watchlist tab in the slide-out (Fig. 18).
Fig. 18

By setting a date in the Date field, the action will be added to your watchlist. The date you enter here is the date to follow-up on this particular action. In this view, you also have the option of assigning a responsible person for the action as well as leaving a comment (Fig. 19).
Fig. 19

Once an action is added to the watchlist, this information will also show up in the Watchlist section of the platform (Fig. 20).
Fig. 20

When the action is added, the responsible person can also be changed directly in the Watchlist section by clicking on the dropdown arrow next to the Responsible field (Fig. 21).
Fig. 21

Currently, it is only possible to assign responsibilities among the people who have access to your ClimateOS account.
Filtering actions
There are two options to filter actions in the Action editor:
- By sectors and sub-sectors
- By connected transition elements
Filter according to sectors and sub-sectors
To filter according to sectors and sub-sectors, click on them from the tree menu on the left-hand side of the Action editor. The sector or sub-sector you're filtering by, as well as how many actions are in the list can be seen above the action list (Fig 22).
Fig. 22

Filter according to connected transition elements
This filter only applies to the full action list!
This filter option allows you to see actions connected to transition elements or all actions. To apply this filter, click on the dropdown menu above the action list. After opening the dropdown menu, click on unconnected actions to only see actions not connected to transition elements. (Fig. 23).
Fig. 23

Deleting actions
In order to delete actions, click on the action you want to delete from the actions list. In the slide-out, click on the bin icon in the upper right-hand corner (Fig. 24).
Fig. 24

Adding and removing action statuses
To add action statuses , click on the Actions tab in the upper navigation bar. Next, click on the Action Settings. (Fig. 25 & Fig. 26).
- Add an action status by clicking on “Add status”
- Remove an action status by clicking on the “X”
Please note the first status is the one shown on the right-hand side of the Dashboard.
In order to delete an action status , you have to remove all the actions from the action status you want to delete or move them to other action statuses.
Fig. 25

Fig. 26